If you are a hands-on kind of person, building a carpenter bee trap might be the perfect project for you! In a few steps, you can create your own DIY version of a carpenter bee trap. We have provided step-by-step carpenter bee trap plans that you can follow along with.
But first, here is a helpful video:
Make Your Own Wood Bee Trap
First, you’ll want to gather all your materials. For this homemade carpenter bee catcher you will need:
- 4x4 cedar or pine post anywhere from 5” to 8” in height. Untreated wood works best!
- Standard mason jar
- 6” wide plank of wood anywhere from ½” to 1” thick
- 1/2” Drill bit
- Drill
- Circular saw or hand saw
- 2 nails
- Hammer
- Eye hook screw
- Metal chain or wire for hanging the trap
DIY Carpenter Bee Trap Directions:
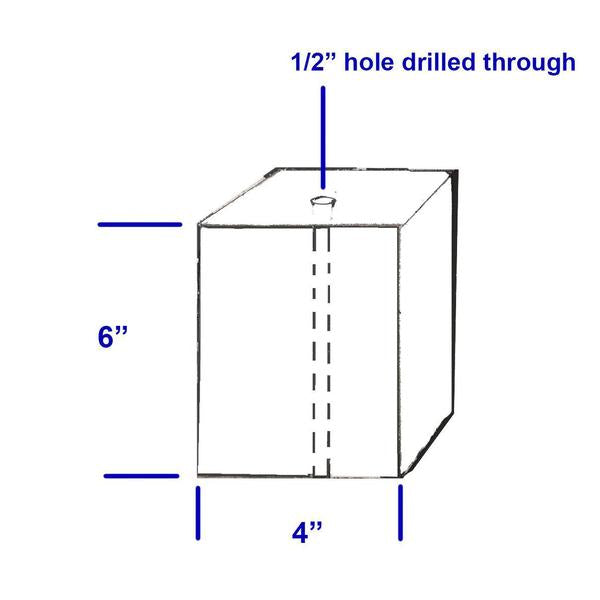
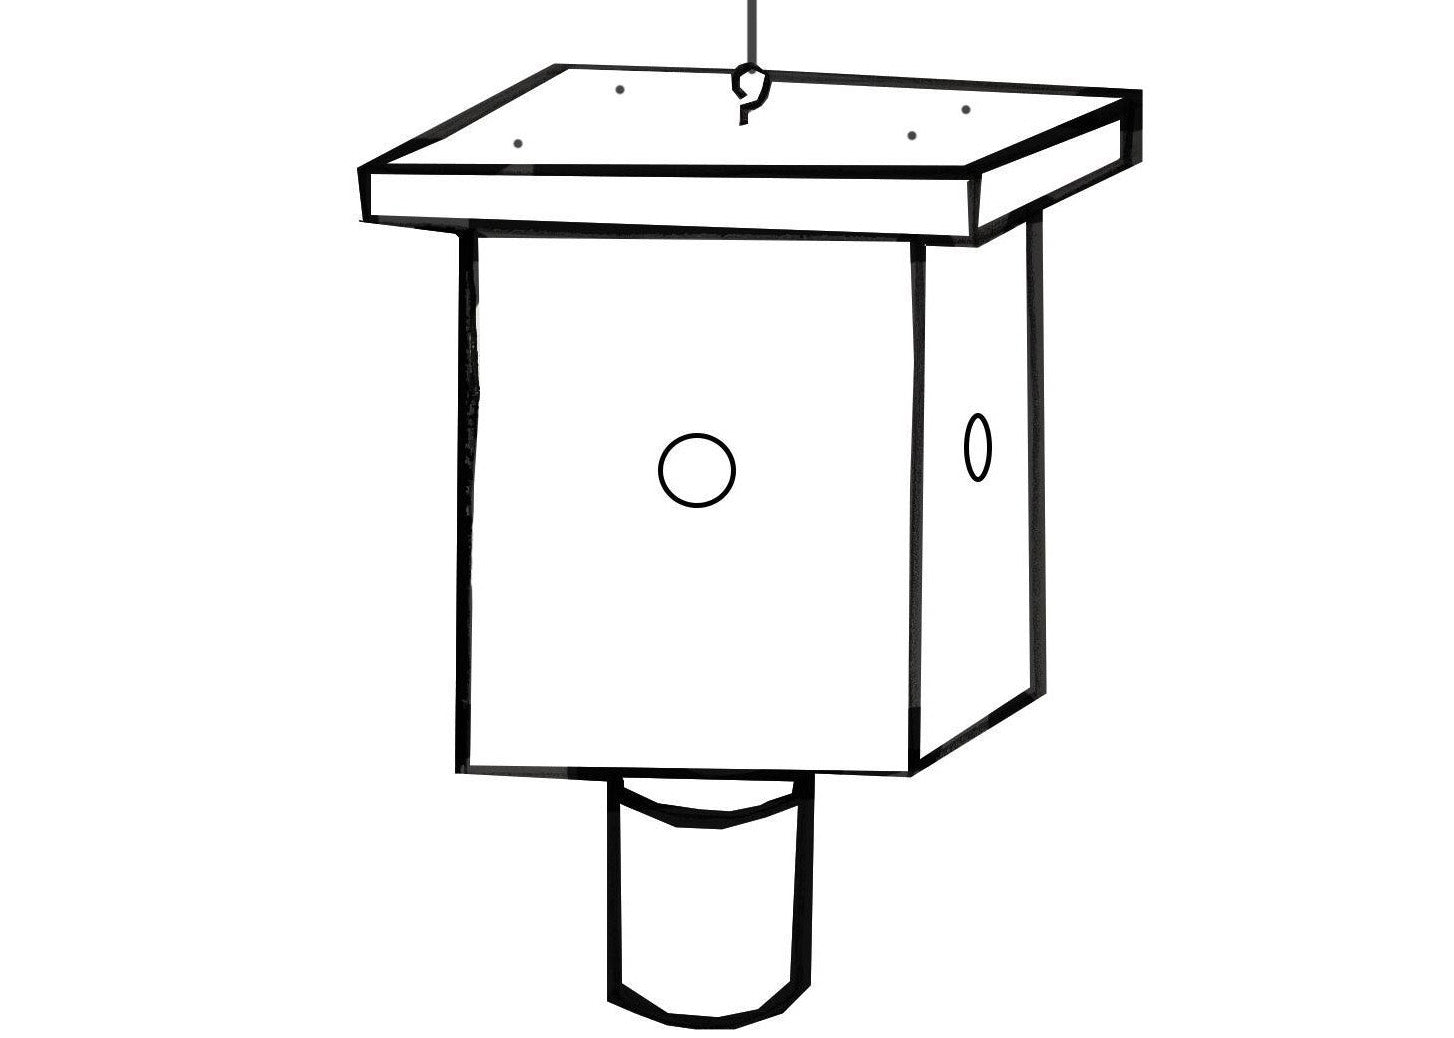
- Cut the post to the desired height. Anywhere between 5” – 8” will work.
- Drill a ½” hole through the center of the post length wise.
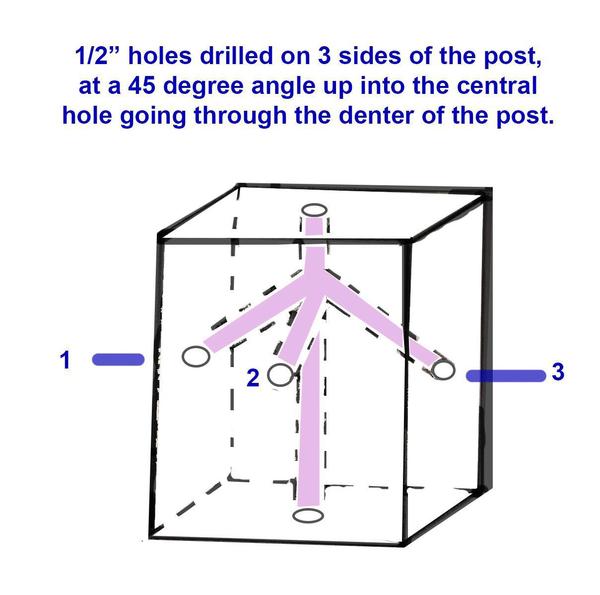
- On three sides of the post, measure out a ½” hole that is 3” from the top and centered.
- Use the ½” drill bit to drill the holes into the post at a 45 degree angle. These holes should connect with the ½” hole drilled through the center of the post. This creates a tunnel system for the carpenter bees.
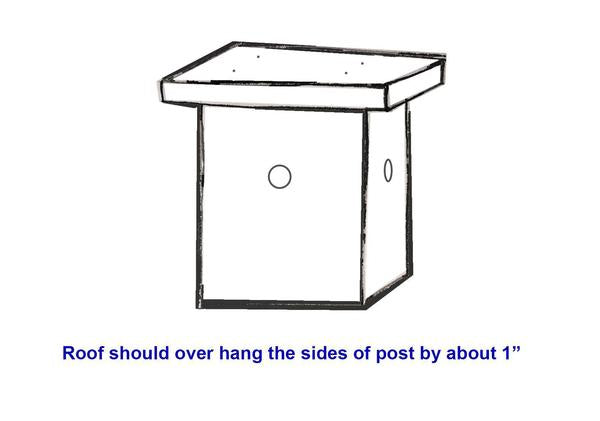
- Take the soft cedar or pine plank wood and cut it so that it sits on top of the post and overhangs each side by about 1”. Nail it into place.
- Take the lid of the mason jar and remove the flat cover. This will leave you with the metal treads. Nail this lid onto the bottom of the post. Have it centered around the bottom hole drilled through the post. Now you can screw the mason jar right into those threads.
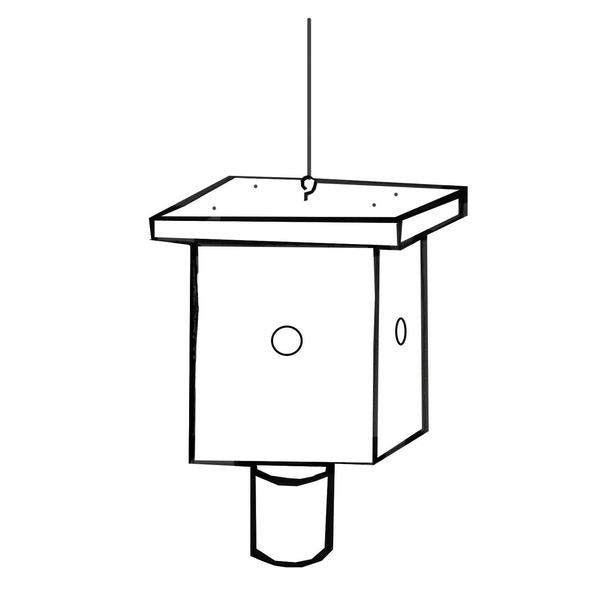
- Almost done! If you want to hang your trap you can screw the eye hook screw into the top of the trap and attach a metal or wire chain. If you want to mount your trap you can place brackets on the roof or the side of the post that doesn’t have a hole. But remember the trap needs to stay completely vertical for best results!
Now you’ve created your own makeshift carpenter bee trap! The whole process can take some time depending upon your skill level and tool quality. While it might not be picture-perfect, it will still catch wood bees!
What Sets Best Bee Brothers Wood Bee Traps Apart?
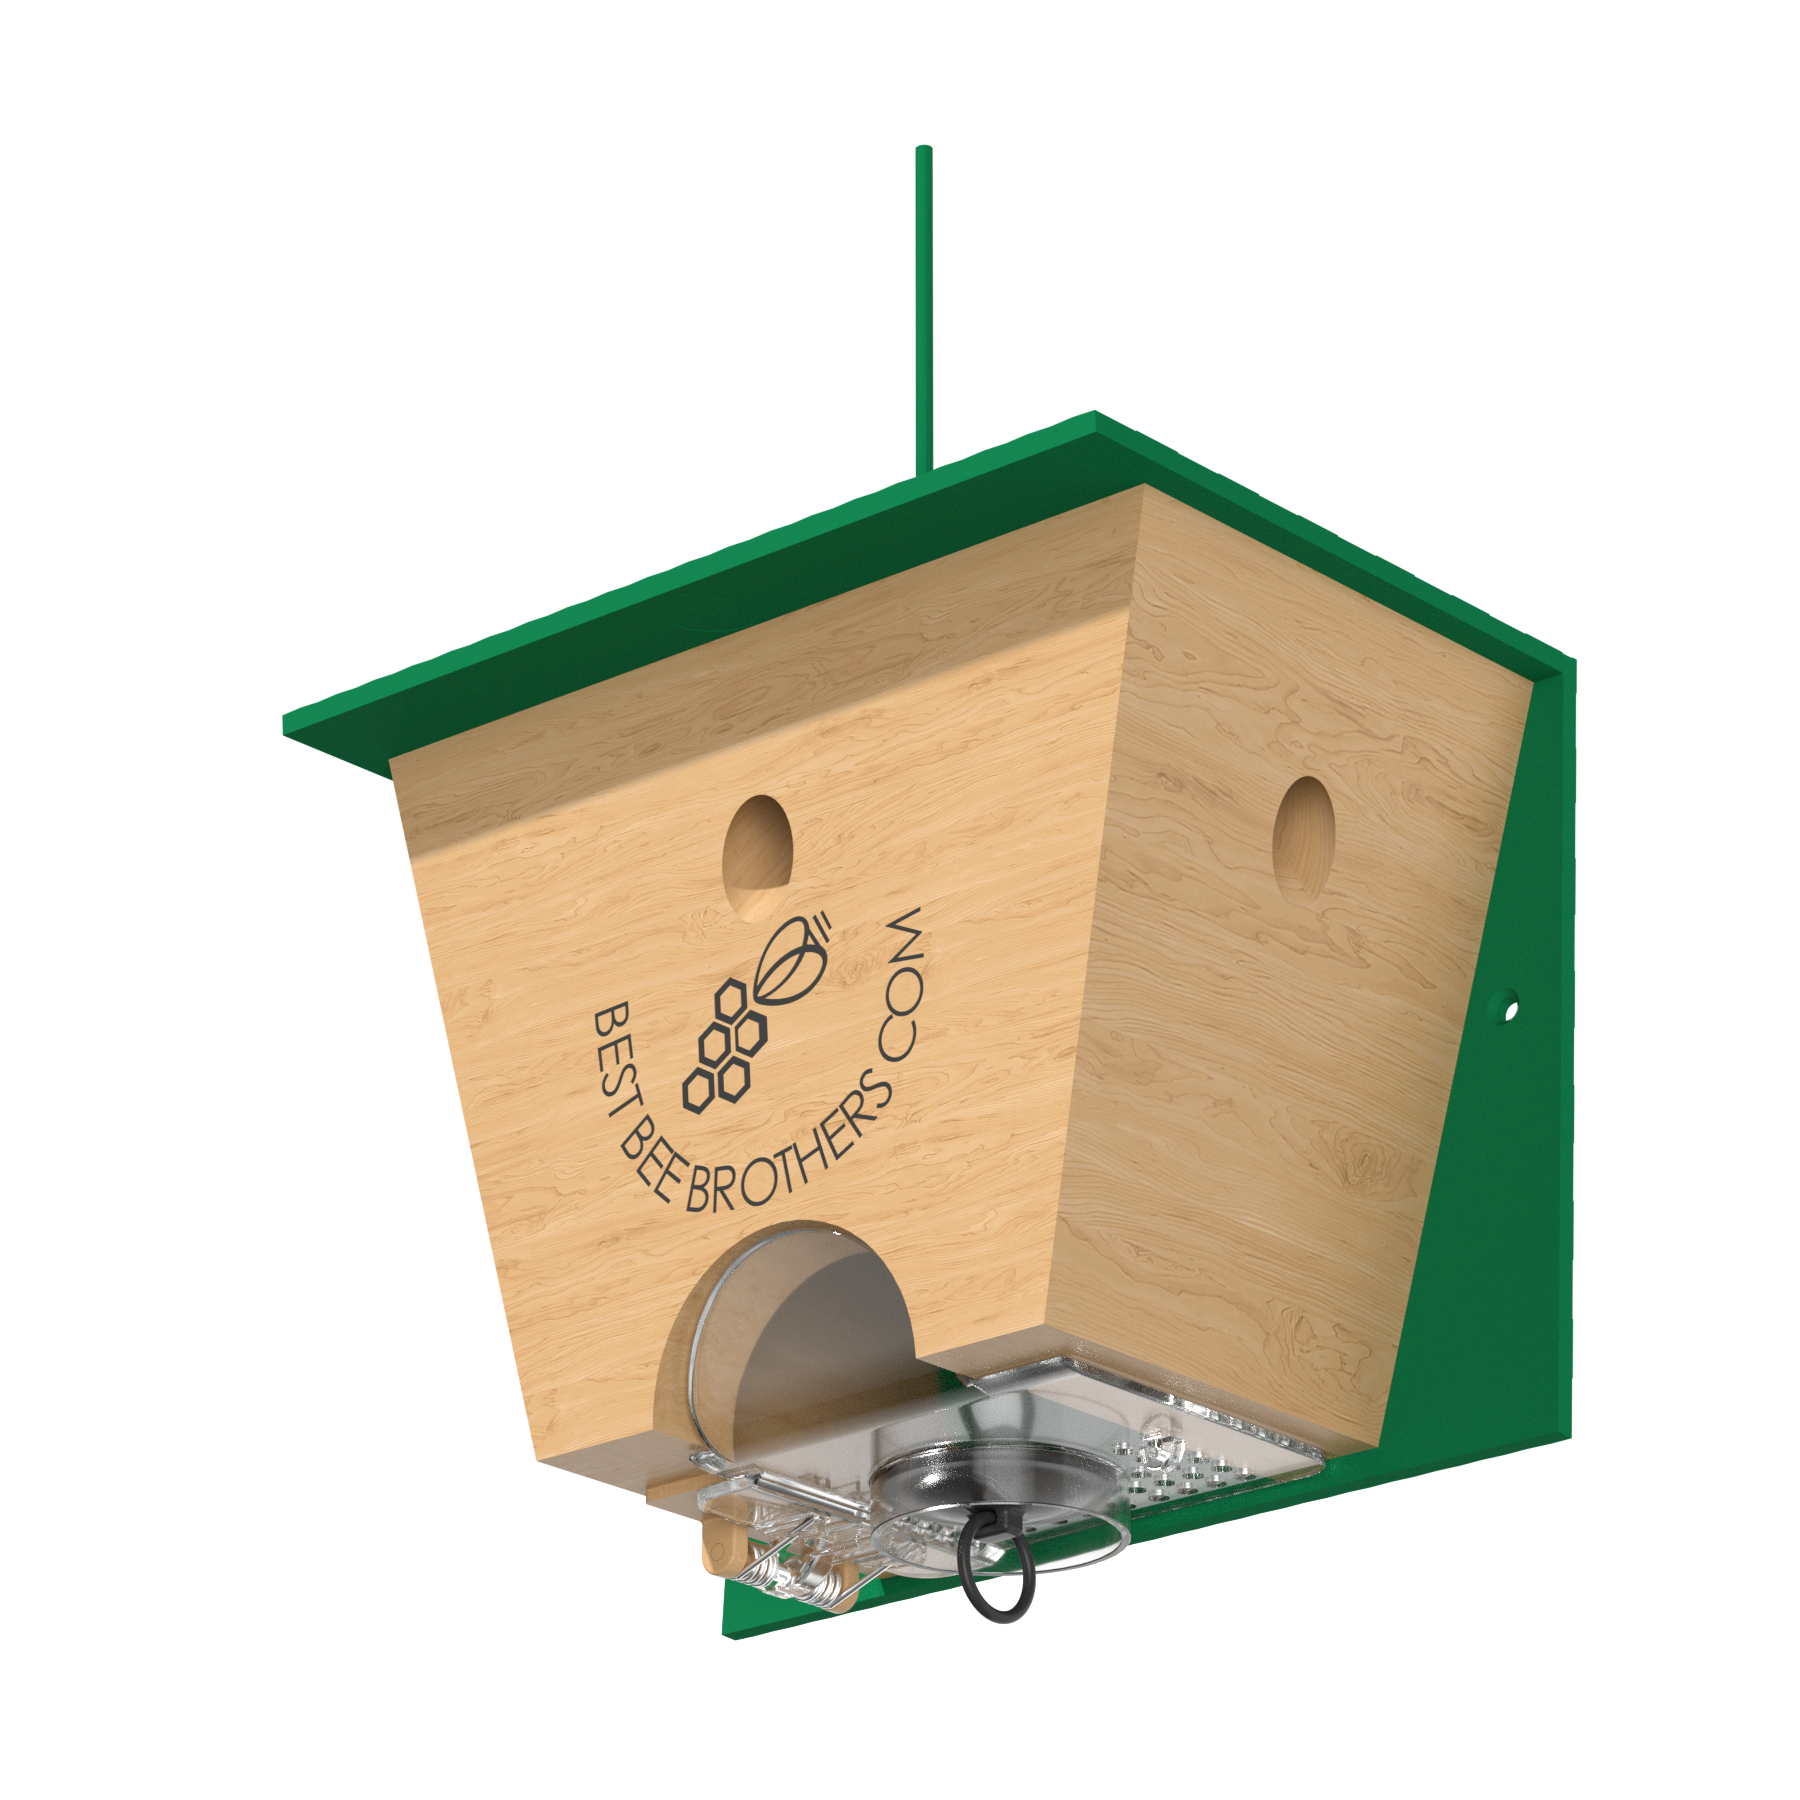
The main differences between DIY traps and our Best Bee Brothers traps are the receptacle containers. Our Best Bee Trap has a perfectly molded plastic funnel and container that is one piece. This whole piece acts as the bottom of the Best Bee Trap and guides the carpenter bees down into the container without the issue of clogging. Carpenter bees also can’t walk up plastic! So once in the trap, there’s no way out.
Another difference is that there are no aeration holes. This feature is seen on both the Best Bee Trap and the Pinewood Bee Box Trap. The aeration holes keep moisture out of the container and spread the pheromone smell of the dead carpenter bees (which is extremely attractive to other carpenter bees and keeps the trap active). The more potent the smell the more potent the trap.
If you love to do things yourself, give this DIY project a go! Otherwise, save yourself the time and energy and give our proven professionally-made, high-quality traps a try! Remember they have a 100% satisfaction guarantee.
Looking to try a different DIY carpenter bee trap variation? We also created a Pinewood Box Trap DIY tutorial video. The concept is similar but it can also be easier to make. Make sure to check out that video to see which carpenter bee trap plans you prefer!




Leave a comment
All comments are moderated before being published.
This site is protected by hCaptcha and the hCaptcha Privacy Policy and Terms of Service apply.